Wednesday, February 27, 2013
Saturday, February 23, 2013
Tuesday, February 19, 2013


Sunday, February 17, 2013
Lola's Bistro New Menu
Hi everyone, check out the new menu at Lola's Bistro.
Video tutorial will be uploaded soon.
Free printables too!!
What's your favourite dish?

Don't forget to subscribe so you don't miss the tutorial and free printables.
If you don't want to make the food...
we are selling them too, you will be able to buy the full package...meals, dishes and menu... we can even add your own restaurant name and make up a logo to add on the top of the menu. More info coming soon!
Thank you
:)
Friday, February 15, 2013
School House Dorm Room 2
Hey everyone, we hope you're all doing well.
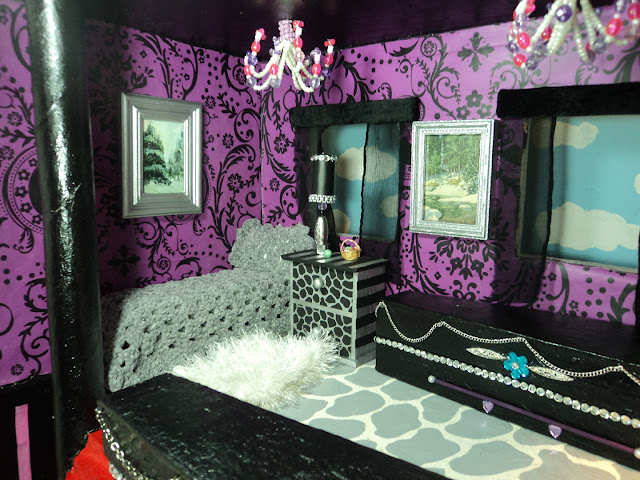
Here is another dorm room we made a few changes too...
When I started this house a year ago, my goal was to get it done quickly, Lola was anxious to start playing with it...so I wanted to make it livable for the dolls, it has gone through some changes this past year, and I think I can finally say it's done.
BEFORE - FEBRUARY 2012


It was not easy getting this room decorated because of the spiral staircase, I don't regret the staircase because I love how it turned out. If I were to start making this now, knowing what I know now, I probably would have added the staircase outside the box...but make it look like it was in the box, did that make sense? The great thing about using cardboard is I can add little sections to it, do cut outs etc...
I will be start working on a new dollhouse for a couple of the characters that may have a spin-off show on our YouTube channel, and it will be a lot brighter, more wooden furniture (aka popsicle sticks) etc... I can't wait to start working on that one. It will most like be my last Monster High Doll project.

I try to make each room look different, instead of adding wallpaper (aka gift wrap) to the full wall, I did half the wall and cut up strips of black paper for the stripes.
The curtains were very simple, I cut up a piece of cardboard, as long as the window and about 1/2" wide, then wrapped black velvet material around it, and glued the curtains to the back of it.

AFTER - FEBRUARY 2013

I didn't like leaving the side walls blank, so to improve the room I painted strips of paper pink, like the back wall and glued the pieces to the walls.
The black velvet frames is a piece of cardboard covered with velvet then I glued my old earrings to them.
I love how they turned out. I can't wait for garage sale season so I can find old earrings to do more of these little pieces of artwork. I also made the mirror on the side wall, I used a small mirror some silver long beads then painted some small sticks pink.


I bought this old pink furry hat at the thrift store, so I cut a couple of pieces to use as rugs. The silver frame was also from the thrift store, I painted the frame silver. We are encouraging our viewers to email us their works of art so we can replace the paintings in the frames. The round box was also found at the thrift store, I added some bling bling to it, its used for their clothing and as extra seating.

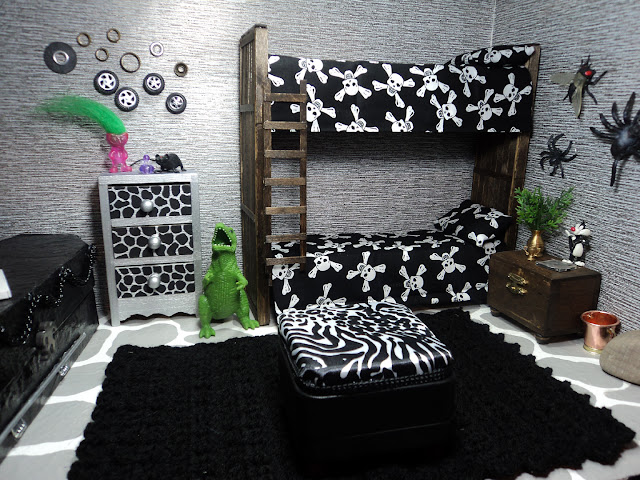
On our next post we will show you the first of two boys dorm room.
Thank you for visiting, before you leave, please vote for us for top 100 doll sites.
Thank you
:)
Thursday, February 14, 2013

Wednesday, February 13, 2013
School House Makeover DORM ROOM 1
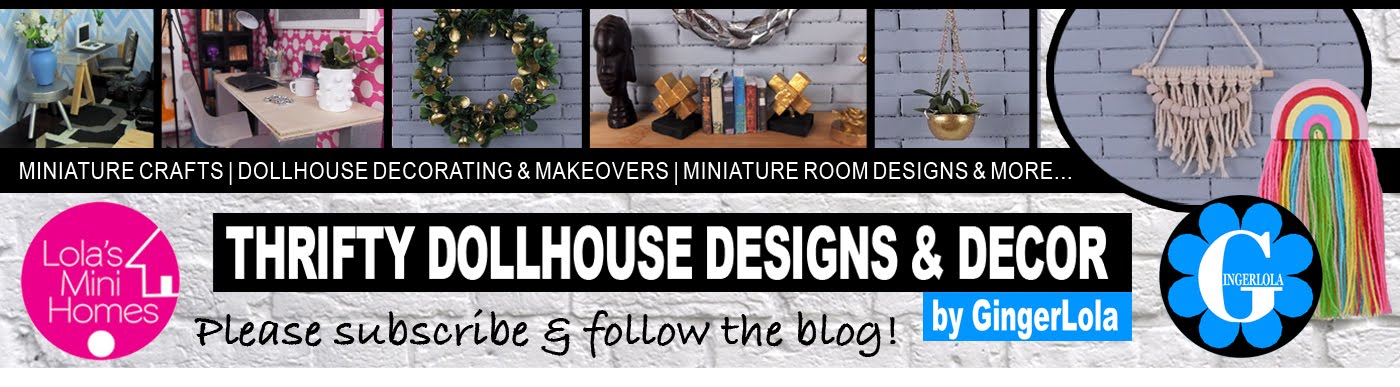
Hey everyone, it's Skull Academy's school house one year anniversary this month. Last year at this time I was still working on it...painting and decorating, but I knew it was always going to be a 'work in progress' during this past year there have been many changes. New dorm rooms, new furniture etc...so here is some old and new pictures of the school house. Since it is our 'school house' one year anniversary, I mean Lola's 'school house' :) we are putting a few videos together on the school house. I will also post one room at a time on this blog during the next week...did I say it was Skull Academy's one year anniversary? I guess we're milking it...:)


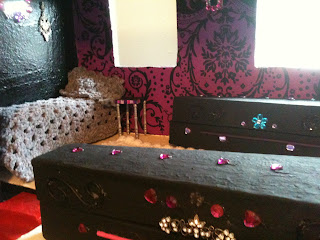


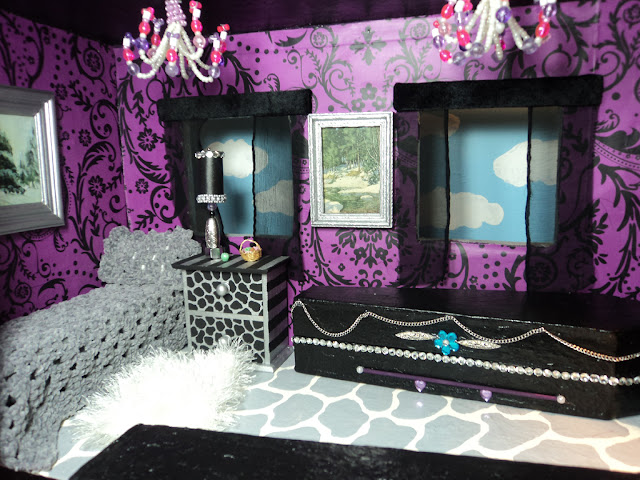

This dormroom is Clawdeen and the Vamp sisters Draculaura and Draculily.
These pictures are older, I have learned a lot this past year about taking photographs and I know there is still so much to know. Plus I really should invest in a better camera.
BEFORE - FEBRUARY 2012


AFTER - FEBRUARY 2013

I love how it looks now... but I do wish I glued some paper on the walls on the right, I didn't realize I missed it until I was taking the pictures - oh well, now it'll have to wait for our 2nd anniversary.
This wallpaper is from a dollar store gift bag. That's where I get my room inspiration. I go to the gift bag wall at the dollar store and search around until something hits me...if nothing inspires me, I go to the giftwrap rolls and hope I find something there.
Almost everything here is made by me...except the art, I found these pictures at the thrift store, I bought them for the frames, I painted the frames silver. I will be changing the art, we want to encourage you to send us pictures of your artwork and we will remove whats in the frame and add yours. We have already received some art, I should have changed it out already but we were hoping to get more. So if you want to see your artwork hanging in our school or restaurant during a scene of Skull Academy...start painting...:)

The chandeliers were made using wire and beads. The curtains are chiffon from an old scarf.
The lamp is also wire and beads. The dresser was a find from the thrift store, I painted it silver, then painted black stripes and a black giraffe print on the drawers. The coffins were made with cardboard and paper mache, then adorned with chains and gems stones. All my materials are found either through thrift stores, dollar stores or garage sales, so anyone can make them because it is inexpensive...cheap.


Hey, did you know that Draculaura collects Barbie dolls? Do you see it in the picture, top right corner.
They are the mini Polly Pockets....:)

The blankets, pillow and little rug are made by my mom, Lola's grandma.

You can find tutorials on the furniture you see in this room on our YouTube channel or click on the tab 'tutorials' just below the header to find the videos there.
I have't done one on the bed yet but will get to it soon.
We want to thank you all for following us, watching our videos and reading our posts. You inspire me to want to keep creating.
Before you leave please vote for our site for top 100 doll sites.
We don't win anything but its really cool to see our little blog on the list.
We also want to welcome all our new subscribers and friends. Thank you so much for joining our blog.
Please come back often and check out the tabs above, we will be updating with new pictures often.
I don't only love creating doll houses and doll crafts, I love seeing others works as well, so please send us pictures of your doll stuff and we would love to post it here and share it.
We will be posting about Cleo, Ghoulia and Frankie's dorm room next.
Thank you
:)
Thursday, February 7, 2013
Jewellery boxes turned into doll dressers...
Hey everyone, I would like to welcome our new subscribers, thank you so much for joining our site.
You will be entered in our big doll giveaway and all future giveaways, we'll be doing them often. If you subscribe to all of our blogs - three in total, we will enter your name ten more times, so why not do it...
It's free and each blog offers something different, but what they do have in common is that's they're all about dolls, dollhouses, and furniture. Thank you :)


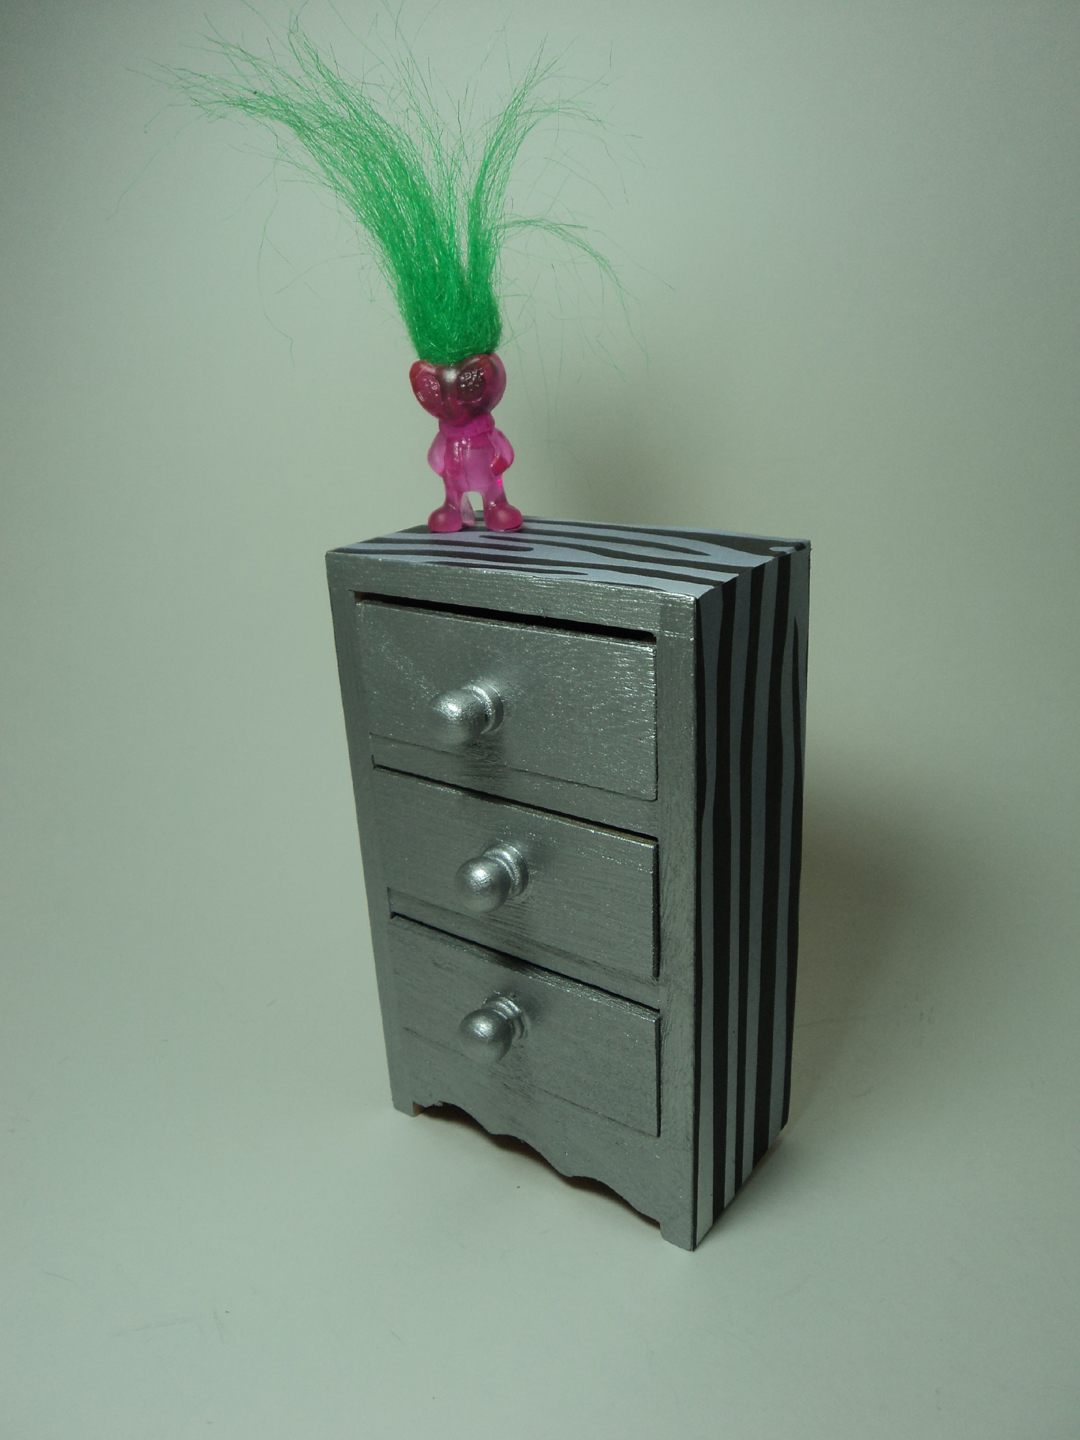
The boys dresser.


You will be entered in our big doll giveaway and all future giveaways, we'll be doing them often. If you subscribe to all of our blogs - three in total, we will enter your name ten more times, so why not do it...
It's free and each blog offers something different, but what they do have in common is that's they're all about dolls, dollhouses, and furniture. Thank you :)
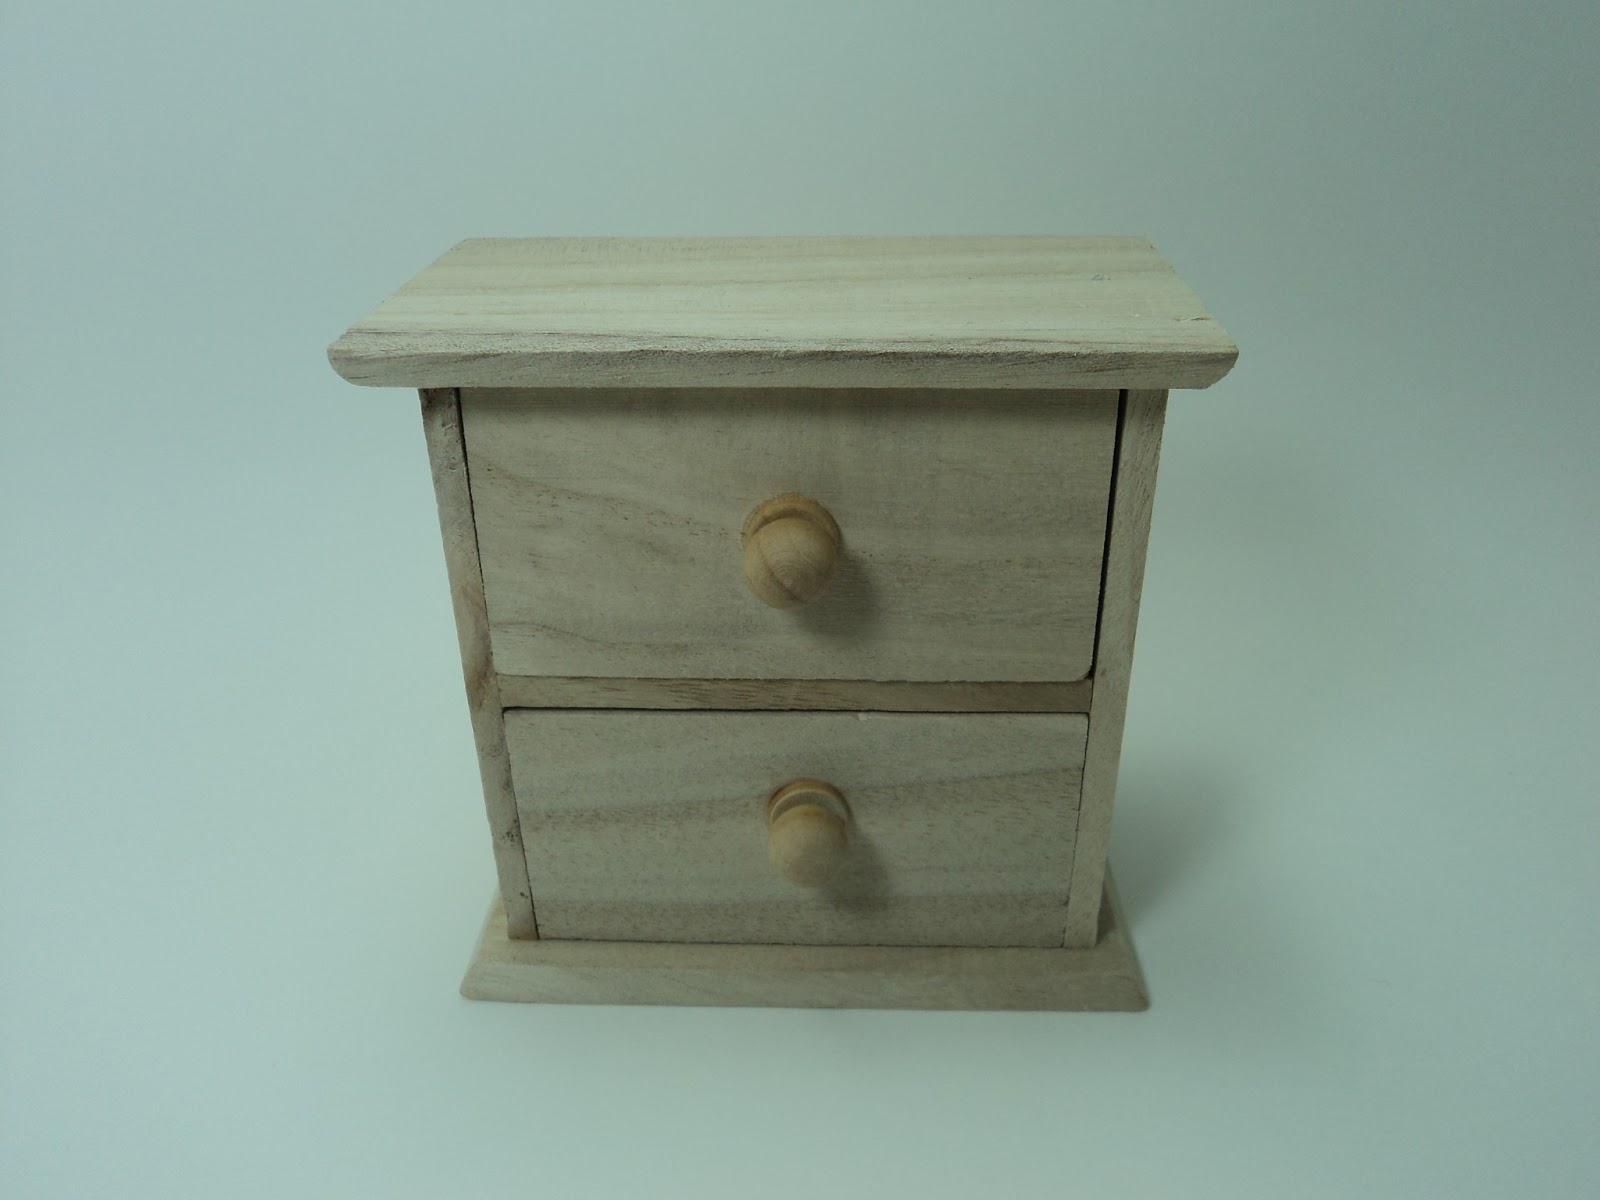
before...I bought this from Value Village for only 99 cents...you can also find these at dollar stores.
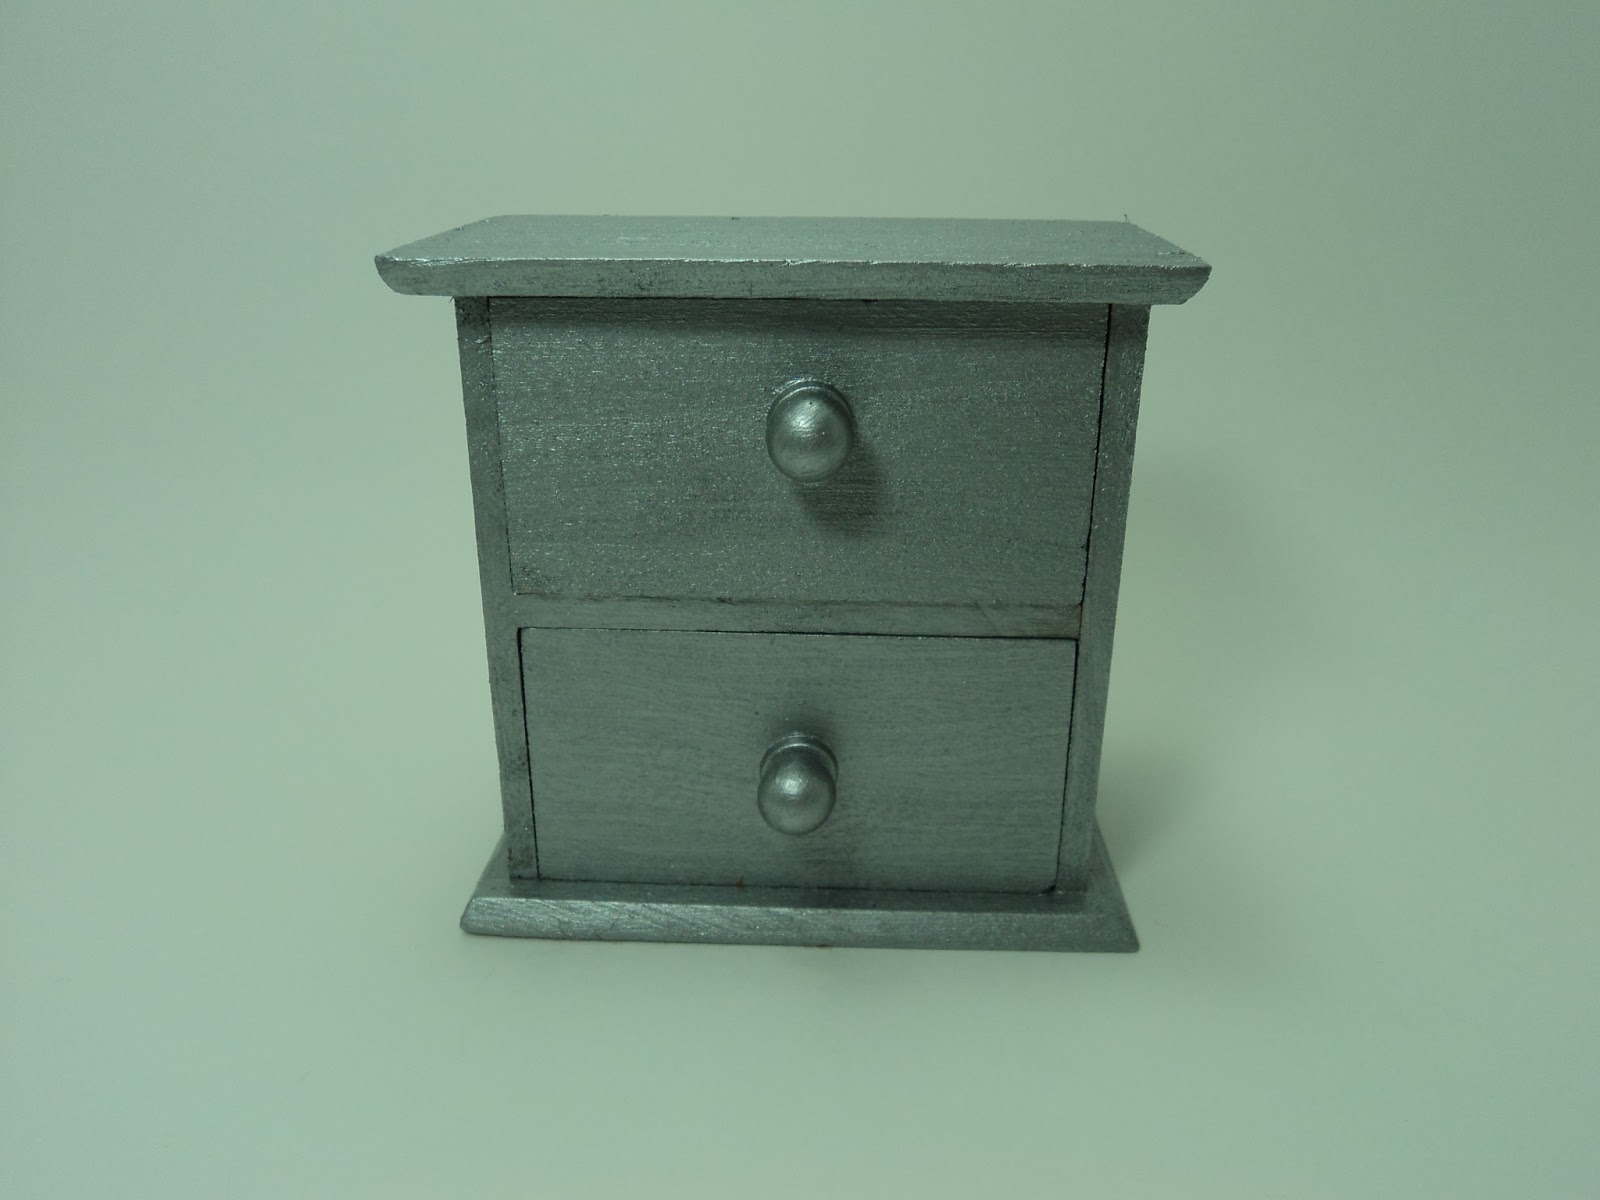
I painted it first with silver craft paint...I love silver and black so I use those colours a lot.

I painted the top and sides black, I used a ruler to mark my lines, then just painted it.

Then I painted the front of the dresser with a giraffe print.


The boys dresser.

before...also purchased this at Value Village for only 99 cents.

I painted it silver as well then for the sides I used scrap paper. I liked the dresser I painted above so I did the same with this one, I love how it looks in the boys dorm room.

Thank you for stopping by.
:)
Tuesday, February 5, 2013
How to Make a Teachers Desk & Chair for dolls
Hey everyone...below is a video tutorial on how to make a desk and chair for your dolls. I made a teachers desk for the classroom. There are more pictures below that are not in the video. Tell us what you think of the stop motion clip at the end of the video.
We want to welcome all our new subscribers, thank you so much for joining our blog. You are now entered in all giveaway draws including the big Monster High doll giveaway we're doing now. We would love it if you subscribed to our other blogs, they all have something different to offer. If you subscribe to all three blogs we will enter your name another 10 times in the giveaway draw...that is a lot of chances to win... plus any comment you leave on our channel also counts, one per day but you can comment every day and that will also mean more chances to win one of the dolls.
Thank you so much for watching, please don't forget to vote for us for top 100 doll sites on the right hand side of the screen. Thank you :)

I forgot to add this in video tutorial... I added another piece of cardboard to the back of the desk.


Bye for now....
Lola's Mini Homes
Subscribe to:
Posts (Atom)